Skip to main content
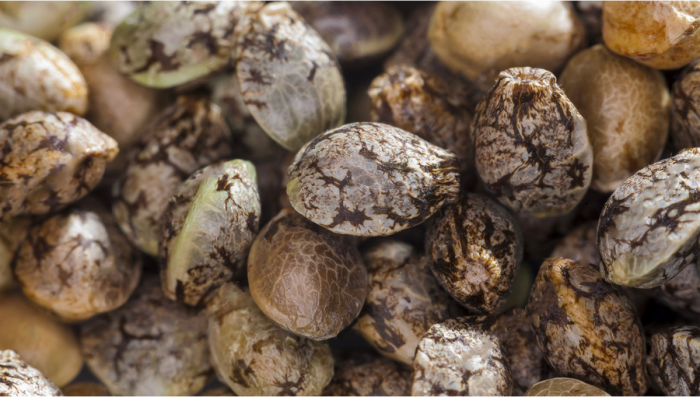
- Put seeds into 6.0 pH water for 14-16 hours. Use the 6.0 pH water throughout these instructions.
- As a NOTE: I always use distilled or rain water.
- Agitate the water until they sink to the bottom.
- Depending on luck/quality - this can take hours, non-stop.
- I personally put the seeds in the bottom of a jar, then fill that jar until it is virtually overflowing; then screw the lid on... this creates a tiny air bubble, it helps both protect the seed from damage while shaking/turning (if you want to help sink them faster)... and, regardless, they are under water the entire time - rather than floating half out.
- Store in a dark area.
- Place seeds onto a plate of paper towels.
- Use more towels under the seeds than above
- I use six sheets below, and two on top
- The seed still needs to be able to breathe.
- They should be two inches from other seeds on the plate.
- They should be laid "flat" and not on their edge.
- That is to say, the edge is what splits open when the tap root sprouts.
- Make sure they stay moist, but they should NOT sit in standing water.
- The seeds/plate need to stay in a dark room with air flow.
- The seeds need to stay at a temperature around 75 degrees.
- Seeds, and further plants, will slow their growth or stop all together at the wrong temperatures.
- Never place inside of a plastic bag, as this can cause the seed to mold and rot.
- Seeds should sprout a tap root within a week; usually within a day or two. If they have not sprouted a root within a week or so, odds are not good that it ever will.
- Once you see a tap root that is at least a quarter inch long...
- Carefully place the seed, root down, into a small cup of dirt designed for germinating seeds.
- I use two inch cups; filled to a marker around a quarter inch below the top.
- The depth should be about half an inch.
- The soil needs to be moist enough that it pulls the shell/husk off of the plant as it grows.
- I moisten the soil before I put it into the container; or I let the water be absorbed from the bottom of the container... the point is: I do not pour the water in.
- Unless the dirt is drying out on its own somehow, there is very little need to water the soil again; but, keep an eye on it.
- My process:
- Place slightly moistened dirt into a 2 inch pot.
- Use a sharpened pencil (shape) to poke a hole into the dirt.
- Use a pair of tweezers to hold the seed at the proper depth.
- Carefully and lightly press the dirt around the edges of the container, this will lock the seed in place.
- Let off the pressure on the tweezers and pull them away from the seed (out of the dirt).
- Put loose dirt over the site of the hole.
- Place into the proper lighting.
- Do NOT compact the soil on top of the seed; a simple covering is fine.
- Plants can take anywhere from a day to a week or more to sprout; although, typically it happens within days. After five days or so, the odds really drop off for getting a viable plant.
- As new plants are largely focused on creating roots at first...
- Follow the instructions that came with your light for lighting for seedlings.
- Typically this is a very low level of light.
- Typically the light will be on for 18-24 hours a day; depending on preference.
- When the plant breaks the surface of the soil it is very important to make sure the seed husk has come off...
- If you see the husk is still around the plant you must act quickly to save your plant...
- I typically, very utterly carefully, use tweezers to remove the husk.
- Your plant is in grave danger if the husk is not removed somehow.
- Troubleshooting: hopefully you will never need this information.
- Pests: If your seedlings are sprouting; but then being mysteriously damaged or disappearing altogether... try these options.
- Lavender, peppermint, eucalyptus, citronella, lemon, and tea tree oil; mixing the scented oils into clean spray bottle with water.
- If none of these smells solves the problem, then you can try to add neem oil to your spray bottle. A warning, neem oil is very toxic and it is important to read how to handle it, and manage it.
- Put seedlings on a table, not on the ground.
- You can use hydrogen peroxide to clean the roots of your plants safely, and without any risk to your plant. If you think something is chewing up the roots; then this might be something that helps - I've never done it myself though, but its a known fix.
- This is why growing tents can be sealed up; its expensive - but it keeps your plants nice and safe from the environment, if you can afford it.
Comments